As the Blogger platform is owned by Google it is not surprising that Blogger makes it very easy to add Google Adsense to your Blogger Blogspot blog. In this tutorial you will learn about different ways to add Google Adsense to your blog. Along the way I will be offerring a few tips about best placement of Google Adsense units. I have aimed this Blogger tutorial at new bloggers and beginners and assumes no prior knowledge of Google Adsense. Bear in mind that before you can start to add Google Adsense to your Blogger blog you will need to have created an Adsense account.
3 Ways to Add Google Adsense to Blogger
There are two main ways to add Google Adsense to Blogger: one is to use a Google Adsense widget and the other is to use a HTML/Javascript widget. There is also a third way, which is outside the scope of this article, which is to hard code the Adsense code directly into the template.
Adding a Google Adsense Widget to Blogger
An Adsense widget is a container for the Google Adsense code. Once created it is easy with Blogger's powerful interface to drag and drop widgets into different positions within your template. Google Adsense widgets can be added to the header, sidebar, footer, or body of your blog. A Google Adsense widget is created when you click on an Add a Gadget button in the Layout > Page Elements menu and then select Adsense.
How to Add a Google Adsense Widget to the Sidebar
The simplest way to add Google Adsense is to select Adsense from the range of gadgets offered in the Layout > Page Elements page. Assuming you are using one of Blogger's standard templates you will more than likely be adding a skyscraper unit 160x600 or similar to the sidebar.
Google will work out the color scheme of the ad unit for you according to your template. You can override these settings if need be and configure the colors manually but stick with the default unless you have good reason not to. Another decision you will need to make is about the format of the ad unit. You can choose between text only and text and image. Personally I prefer text units for sidebars as you get more bites of the cherry than with an image unit. Images only advertise one thing while text units may provide up to 5 different links. However if you need a particular look you might still need to go for the image unit which is why Google offer this flexibility in the first place. Bear in mind that the combined text and image units are considered to be the highest earners.

Add an Adsense Widget to the Footer
Another not so widely used place for a Google Adsense unit is in the footer of your blog. If your template has a footer (eg Blogger standard templates like Minima and Rounders both have footer sections) you can add a Google ad unit to this area too. Footers are becoming increasingly popular places to add information like Archives and Follower widgets so visitors are getting used to the idea of scrolling down to the bottom of the page to check out the footer.
A linked 728x15 ad is a good choice for a footer position especially if you have a Followers widget enabled in the footer. I place this linked ad unit directly above the Followers widget. I suggest you make use of linked units if you can - you are allowed up to 3 linked units per page. Linked ad units can earn revenue if strategically placed on your blog. Do keep in mind though that Google Adsense units nearer the top and middle of the page are more visible and are likely to be your top performers.

HTML/Javascript Widget
The second way to add Google Adsense to your blog is to use a HTML/Javascript widget. Make use of these if you want to have more control over your advertising and track your Google ad units. To get the code in the first place you will need to login to Google Adsense and create each ad unit in the size of your choice from the Ads for Content menu. This will allow you to set up a unique channel for each ad unit you create so that you can identify which are your top performing units. For every new ad unit generated Google Adsense provides the code which you will need to copy and paste into a HTML/Javascript widget positioned in either the sidebar or the footer position.
How to Add Google Adsense Between Posts
Blogger is such a powerful Blogging platform with so many great features. One of these features is the facility to set Adsense to appear between blog posts. All that is needed is to navigate to Layout > Page Elements. Click on the edit Blog Posts link and check Show Ads Between Posts (last in the list)from the Select Items menu. I usually select 336x280 ad unit size as this gives a good ratio of links for the size. I also prefer text units for this position too as again you are more likely to have a visitor click on a link if they are presented with quite a few. Save and view your blog. Blogger automatically places one of three Google Adsense ads directly below each of the first three posts. If you want to space the ads further apart you can do so though in my experience there really is no advantage in doing this.
Remember that you can have up to three ad units and up to three linked ad units displayed at any one time. If you have ads in another part of your blog for instance Blogger will automatically recognise this and only display 2 other ad units. Sometimes I notice there is a bit of a glitch with Blogger and it may not display sidebar ads in favour of 3 ads in between posts so you might have to play around with this a little to get the positioning you want.

Note: To Center the Google Adsense Ad Unit
In my next couple of articles about Google Adsense I will be discussing how to add Google Adsense to other parts of your Blogger template including in the header, before the first post, after the last post, and in the middle of posts. This article has covered the basics of placement of Google Adsense for Blogger and offerred some suggestions about best placement of Google Adsense ad units.
Related Articles
Better Placement of Google Adsense in Blogger Blogs
Avoid 6 Common Blogger Mistakes
Blogger's Guide to Google Adsense Myths
Add Google Adsense to a Blogger Header
Blogger Guide to Google Adsense Placement
List of Blog Know How Blogger Tutorials
3 Ways to Add Google Adsense to Blogger
There are two main ways to add Google Adsense to Blogger: one is to use a Google Adsense widget and the other is to use a HTML/Javascript widget. There is also a third way, which is outside the scope of this article, which is to hard code the Adsense code directly into the template.
Adding a Google Adsense Widget to Blogger
An Adsense widget is a container for the Google Adsense code. Once created it is easy with Blogger's powerful interface to drag and drop widgets into different positions within your template. Google Adsense widgets can be added to the header, sidebar, footer, or body of your blog. A Google Adsense widget is created when you click on an Add a Gadget button in the Layout > Page Elements menu and then select Adsense.
How to Add a Google Adsense Widget to the Sidebar
The simplest way to add Google Adsense is to select Adsense from the range of gadgets offered in the Layout > Page Elements page. Assuming you are using one of Blogger's standard templates you will more than likely be adding a skyscraper unit 160x600 or similar to the sidebar.
Google will work out the color scheme of the ad unit for you according to your template. You can override these settings if need be and configure the colors manually but stick with the default unless you have good reason not to. Another decision you will need to make is about the format of the ad unit. You can choose between text only and text and image. Personally I prefer text units for sidebars as you get more bites of the cherry than with an image unit. Images only advertise one thing while text units may provide up to 5 different links. However if you need a particular look you might still need to go for the image unit which is why Google offer this flexibility in the first place. Bear in mind that the combined text and image units are considered to be the highest earners.

Add an Adsense Widget to the Footer
Another not so widely used place for a Google Adsense unit is in the footer of your blog. If your template has a footer (eg Blogger standard templates like Minima and Rounders both have footer sections) you can add a Google ad unit to this area too. Footers are becoming increasingly popular places to add information like Archives and Follower widgets so visitors are getting used to the idea of scrolling down to the bottom of the page to check out the footer.
A linked 728x15 ad is a good choice for a footer position especially if you have a Followers widget enabled in the footer. I place this linked ad unit directly above the Followers widget. I suggest you make use of linked units if you can - you are allowed up to 3 linked units per page. Linked ad units can earn revenue if strategically placed on your blog. Do keep in mind though that Google Adsense units nearer the top and middle of the page are more visible and are likely to be your top performers.

HTML/Javascript Widget
The second way to add Google Adsense to your blog is to use a HTML/Javascript widget. Make use of these if you want to have more control over your advertising and track your Google ad units. To get the code in the first place you will need to login to Google Adsense and create each ad unit in the size of your choice from the Ads for Content menu. This will allow you to set up a unique channel for each ad unit you create so that you can identify which are your top performing units. For every new ad unit generated Google Adsense provides the code which you will need to copy and paste into a HTML/Javascript widget positioned in either the sidebar or the footer position.
How to Add Google Adsense Between Posts
Blogger is such a powerful Blogging platform with so many great features. One of these features is the facility to set Adsense to appear between blog posts. All that is needed is to navigate to Layout > Page Elements. Click on the edit Blog Posts link and check Show Ads Between Posts (last in the list)from the Select Items menu. I usually select 336x280 ad unit size as this gives a good ratio of links for the size. I also prefer text units for this position too as again you are more likely to have a visitor click on a link if they are presented with quite a few. Save and view your blog. Blogger automatically places one of three Google Adsense ads directly below each of the first three posts. If you want to space the ads further apart you can do so though in my experience there really is no advantage in doing this.
Remember that you can have up to three ad units and up to three linked ad units displayed at any one time. If you have ads in another part of your blog for instance Blogger will automatically recognise this and only display 2 other ad units. Sometimes I notice there is a bit of a glitch with Blogger and it may not display sidebar ads in favour of 3 ads in between posts so you might have to play around with this a little to get the positioning you want.

Note: To Center the Google Adsense Ad Unit
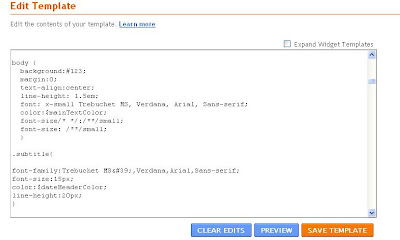
- Go to Layout > Edit HTML
- Check the Expand Widget Templates box
- Make sure you back up your template before proceeding
- Find the code block beginning with this line:
<data:defaultAdStart/>
- Scroll down until you find these lines:
<div class='inline-ad'>
<data:adCode/> - Change these lines to the following:
<div class='inline-ad'>
<P ALIGN='center'><data:adCode/></P> - Save template
In my next couple of articles about Google Adsense I will be discussing how to add Google Adsense to other parts of your Blogger template including in the header, before the first post, after the last post, and in the middle of posts. This article has covered the basics of placement of Google Adsense for Blogger and offerred some suggestions about best placement of Google Adsense ad units.
Related Articles
Better Placement of Google Adsense in Blogger Blogs
Avoid 6 Common Blogger Mistakes
Blogger's Guide to Google Adsense Myths
Add Google Adsense to a Blogger Header
Blogger Guide to Google Adsense Placement
List of Blog Know How Blogger Tutorials

