Popular Posts

Showing posts with label Widgets. Show all posts

Add Latest Live Chat widget to your Blog Released By ChatWing with 1000+ user capacity

Chat Wing Introduces a new featured chatting widget especially for bloggers to engage more their instant visitors while it is a common considered concept that blogging is most impactive and easy platform to spread the information in all over the web>So according to fact that blogging is most trending and hot topic in upcoming days Chatwing releases a version of Chat widget which more faster, stable, and easy in installing to your blog.It is also know for social media integration that allow users, by login with there Facebook or Twitter profile to exchange social media information and for instant questioning and answering to each other.Let's see that how you can add it to your blog

1.Go to http://chatwing.com/ and register for an account with your Blog URL
email address and password

2.After completing the Log In process click on Get ChatWing button
3.There are two types of widgets that one is a Embed Live Chat Box that will appear in shape of chat box on your home page and 2nd type is to Embed simply a Chat Now Button that when a visitor will click on it a pop up chat box will appear on your home page.Now it your will that what you select for your blog.
4.After select click on next.
5.In the next page you can customize settings for your selection like choose frame color, size and grab Html code and copy it
6.Now go to your blogger design page and add a HTML gadget, past the above copied in gadget and save it.
That's all you are done




Floating Social Sharing Bar for Pinterest Facebook Twitter Google +1 and other Social sharing Buttons For Bloggers

GrinePK blogging resourcesA well designed social sharing floating bar widget with the combination of counter buttons of giant social media platforms like Pinterest, Twitter, Facebook Google +1 and including Sharethis and Addthis services, I think it covers all of your blog's social needs by easily adding it to your blog and I am assured about it that it will detained you from adding other more social widgets to your blog especially in case of decrease the loading time of your blog homepage.In this post you will find that how you can add this widgets to your blog.


1.Sing In to your blogger and go to Blog's Edit HTML page
2.Tick on Expand widget Template box
3.Search for the following code by using CTRL+F

  <b:includable id='post' var='post'>


4.Add the following code just right below the above code


<b:if cond='data:blog.pageType == &quot;item&quot;'> 
<b:if cond='data:blog.pageType != &quot;static_page&quot;'> 
<style> 
.mbt_social_floating{ 
    position:fixed; bottom:10%; margin-left:-60px; float:left;     width:60px; 
    background-color:#f7f7f7;     padding: 5px 0 0px 0px; 
     border-top:1px solid #ddd; 
border-left:1px solid #ddd; 
border-bottom:1px solid #ddd; 
z-index:9999px !important; 
border-radius:5px;-moz-border-radius:5px;-webkit-border-radius:5px; 

.mbt_social_floating .mbt_side_social_button{ 
    margin-bottom:5px; 
    float:none; 
    height:auto; 
    width:60px; 

.mbt_social_floating .st_twitter_vcount, .mbt_social_floating.st_plusone_vcount, .st_email{ 
    margin-left:5px; 

.mbt_social_floating .st_fblike_vcount{ 
    margin-left:5px; 

.mbt_social_floating .stButton_gradient{ 
    background:none !important; 
    height:21px !important; 
    padding-left:0 !important; 

.mbt_social_floating .chicklets, .mbt_social_floating .stMainServices { 
    background:url(&#39;https://blogger.googleusercontent.com/img/b/R29vZ2xl/AVvXsEjSvgg6kVbh9_FdeMvJViz2GVeuEMkmHbZ9ALe4IcuI0mlMmffhXbhX9MNcAWCuYHW3zO1MEldpVI-0jFBCoKAwRSpDJ7uYZpLXpMEAgraG3l6MiSqUV0zQn6MuDGG0Mr2YgWC2qoRLqX86/s400/gc_social_sprite.gif&#39;) no-repeat !important; 
    height:19px !important; 
    width:45px !important; 
    padding:0 !important; 

.st_email .chicklets{ 
    background-position:0 -77px !important; 
    background-image:url(&#39;https://blogger.googleusercontent.com/img/b/R29vZ2xl/AVvXsEjSvgg6kVbh9_FdeMvJViz2GVeuEMkmHbZ9ALe4IcuI0mlMmffhXbhX9MNcAWCuYHW3zO1MEldpVI-0jFBCoKAwRSpDJ7uYZpLXpMEAgraG3l6MiSqUV0zQn6MuDGG0Mr2YgWC2qoRLqX86/s400/gc_social_sprite.gif&#39;) !important; 

.mbt_social_floating .st_twitter_vcount .st-twitter-counter{ 
    background-position:0 -58px !important; 

.mbt_social_floating  .stButton_gradient{ 
    border:none !important; 

.mbt_social_floating .stBubble_count{ 
    width:44px !important; 
    font-size: 15px !important; 
    font-weight: normal !important; 
    padding-top:7px !important; 
    height:23px !important; 
    background:none !important; 

.mbt_social_floating .st_twitter_vcount .stBubble_count{ 
    color:#00a6df; 
    background-color:#f8fbfc !important; 


.st_fblike_vcount{ 
    margin-bottom: 0px; 
    display: block; 

.st_twitter_vcount{ 
    margin-bottom: 3px; 
    display: block; 


.st_email{ 
    margin-bottom: 5px; margin-top: 3px; 
    display: block; 

.mbt_social_floating .stBubble{ 
    background-position: 21px 31px !important; 
    height:35px !important; 

</style> 

<div class='mbt_social_floating'> 
    <script type='text/javascript'>var switchTo5x=true;</script> 
    <script src='http://w.sharethis.com/button/buttons.js' type='text/javascript'/> 
    <script type='text/javascript'>stLight.options({onhover:false});</script> 
    <span class='st_fblike_vcount' displaytext=''/> 
    <span class='st_twitter_vcount' displaytext='' st_via='SEOGrinePK'/> 
<div style='margin:5px 0 0px 0;'> 
<center><a class='pin-it-button' count-layout='vertical' expr:href='&quot;http://pinterest.com/pin/create/button/?url=&quot; + data:post.url'>Pin It</a> 
<a href='javascript:void(run_pinmarklet())' style='margin-left:-46px; width:43px; height:20px; display:inline-block;'/> 
<script src='http://assets.pinterest.com/js/pinit.js' type='text/javascript'/> 
<script type='text/javascript'> 
function run_pinmarklet() { 
var e=document.createElement(&#39;script&#39;); 
e.setAttribute(&#39;type&#39;,&#39;text/javascript&#39;); 
e.setAttribute(&#39;charset&#39;,&#39;UTF-8&#39;); 
e.setAttribute(&#39;src&#39;,&#39;http://assets.pinterest.com/js/pinmarklet.js?r=&#39; + Math.random()*99999999); 
document.body.appendChild(e); 

</script> </center> 
</div> 
<div style='margin:0px 0 0 5px;'> 
    <span class='st_plusone_vcount' displaytext=''/> 
</div> 
    
<div class='addthis_toolbox addthis_default_style ' style='margin:5px 0px 5px 8px;'> 
<a class='addthis_counter'/> 
</div> 
<script src='http://s7.addthis.com/js/250/addthis_widget.js' type='text/javascript'/> 
<script type='text/javascript'> 
var addthis_config = { 
     ui_cobrand: &quot;MY BLOGGER TRICKS&quot;, 
ui_header_color: &quot;#ffffff&quot;, 
     ui_header_background: &quot;#0080FF&quot; 

</script> 
<span class='st_email' displaytext=''/> 
<p style=' line-height:0px; font-size:10px; font-weight:bold; text-align:center;'><a href='http://www.mybloggertricks.com/2012/05/create-floating-bar-for-pinterest-other.html' style='color:#CAC8C8;'>Widgets</a></p> 
</div> 
</b:if></b:if>


5.You just have to SEOGrinePK  with your Twitter Account Name

Related Post Widget for Blogger Add a fully Customized Related Post Widgets to your BLOg

A fully customized related post widget always helps you to engage more and more your instant audience on your site that they spent enough much time on your site which becomes the cause of decrease in bounce rate.Unfortunately in all over the there is no official widget for blogger platform.but now you can easily add this featured fully customized  widget to your best blog.In this post you will find that how you can do this.
   So what you have to do it is just a simple and easy process just follow the below instructions.
1.Go to Partner.nrelate.com. Register for a new account with your bio data.
2.After filling and submitting the registration form confirm your the email in your inbox.
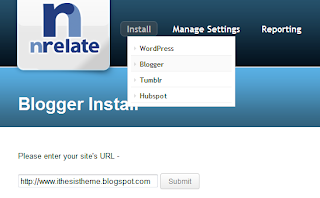
3.Click on install tab and choose Blogger.
4.In the next upcoming window enter your blogger URl and submit it
5.In the nest page you be will asked for the follow options that where you want place the widget.
6.After selecting your desired option click on continue.
In the next upcoming window click on Add to Blogger button, then press add the widget .
that's it and you are done
How you can customize the current related post widget 
In partners.nrelate.com dashboard click on Manage Settings for further customization.Where you can change the style, thumbnail size, enter the title for your widget as you like, number of posts etc... 

Add Official Facebook Recommendation Widget to your Blog Blogspot

A new beta plugin called facebook recommendation like widget is recently introduces by facebook which is specially designed to increase your facebook likes and drives more traffic from face to your blog.After adding the widget to your blog it appears in lower left or right corner(depend upon your wiggetsettings) in bottom.So in this you will see that how you can easily add it to your blog.Now what you have to do just follow the below instructions and you are done.
  Before starting the process remember that for fully functional Facebook recommendation bar every blog must the facebook Open Graph meta tags which you can find on GitHubs gist  and which is below.Now just sign in to your blogger account.

1.Go to Dash board >Design Page >Edit HTML
2.Search for <head> by pressing CTRL +F
3.Add the following code after <head>

  <!-- Begin Open Graph metadata -->
<b:if cond='data:blog.pageType == &quot;item&quot;'> <meta content='article' property='og:type'/> <meta expr:content='data:blog.title' property='og:site_name'/> <meta expr:content='data:blog.pageName' property='og:title'/> <b:if cond='data:blog.postImageThumbnailUrl'> <meta expr:content='data:blog.postImageThumbnailUrl' property='og:image'/> </b:if><b:else/> <meta expr:content='data:blog.title' property='og:title'/> <meta content='website' property='og:type'/></b:if> <meta expr:content='&quot;en_US&quot;' property='og:locale'/><meta expr:content='data:blog.canonicalUrl' property='og:url'/> 
<!-- End Open Graph metadata --> 

4.Sign in to your facebook account go to Facebook Developer page and directly click on Get Code 
5.Click on Create a new Application.
6.Enter your Blog name in Application Name and your Blog URL in Application URL and click on continue.
7.In next Tab enter captcha code and submit it.
8.Now click on the Get Code button again.
9.Now copy the 1st JavaScript SDK code not 2nd
10.Go to your Blop Edit HTML page and tick on Expand Template Widget box.
11.Search for <body> by using the fuction CTRL+F and enter the above copied code right after the <body>
Save the template and you are done