Popular Posts

Increase Google Page Rank Blogger Blogspot

Today I continue my series of articles on search engine optimization SEO for a Blogger Blogspot blog. The focus of this article is on increasing the Google Page Ranking of your Blogger Blogspot blog. If your blog is like mine and relatively new you will find getting off the lowest rung of the Google Page Ranking a bit of a mission but it can be done particularly if you use solid SEO techniques.

To recap search engine optimization is the process of making your website search engine friendly. As major search engines like Google and Yahoo will drive most of the traffic to your blog the more search engine friendly your blog is the more traffic you are likely to receive.

There are a number of SEO - search engine optimization techniques you can employ on your blog to boost traffic such as adjusting titles tags, making use of meta tags, using keywords and keyword phrases, improving keyword density, submitting your blog sitemap to search engines. I have discussed these in detail in my article SEO Tips for Blogspot Blogger blog.

I have already written a number of other articles about SEO for Blogger Blogspot blogs too including the following articles so if you want help with basic search engine optimization try these:

How to Create Search Engine Friendly Permalinks for Blogger
Add Breadcrumb Navigation to Blogger Blogspot Blog
Add Meta Tags to Blogger Blogspot Blog for Better SEO
Adjust Blogger Title Tags for Better SEO
How to Add a Blogger Sitemap to Major Search Engines
Submit You Blogspot Blog to Yahoo
Add Blogger Sitemap to MSN Live
10 Tips to Build Traffic for Blogspot Blogger Blog

Once you've started employing these SEO (search engine optimization) techniques and tips you are going to want to measure your blog's progress. Two important tools that measure the popularity of websites are Google Page Ranking and Alexa Ranking.

Improve the Google Page Ranking of Your Blogger Blogspot Blog
Google Page Ranking is a tool which ranks websites listed in the Google search engine. Websites are ranked on a scale of 0-10 with 0 being the lowest possible score for a site and 10 the highest. The higher the page ranking of your site, the greater the amount of traffic it receives in comparison to other sites. Check your Google Page Rank.

Google uses a complex formula to rank websites which I am not going to cover here. However there are some basic tips about Google Page Ranking that are useful for any Blogger webmaster to know.
  1. Make sure your posts are keyword rich.
    Google expects good usage of keywords so make sure your Blogger blog posts have a density of 3-5%. Keyword density is calculated by the number of keywords divided by the number of total words on a page. If your blog article is 500 words long and has 10 keywords it has a keyword density of 2%. A keyword density of anywhere between 2% and 7% is considered an acceptable range by Google. Anything percentage higher than 7% may well be regarded as keyword stuffing and your blog is likely to be penalized. You can check the keyword density using tools like

  2. Post to your blog frequently
    Make sure you post frequently as Google prefers fresh pages and does not like out of date sites

  3. Create internal links
    Link to previous articles you have written. If you have not cross linked as you posted it is probably worth going back and doing this even if it is a bit arduous.

  4. Build external links to other sites on an ongoing basis
    Build links on a regular basis by commenting on other related blogs and in forums. Add social bookmarking buttons to your blog to encourage readers to bookmark and share your articles. Be aware though that many sites such as Reddit, Digg and del.icio.us implement the link attribute rel="nofollow" which will not boost your ranking.

    Ensure your blog is properly indexed by major search engines. List your blog in blog directories. Watch out for blog directories though as some require you to put a link on your blog but do not reciprocate with a link. See my article on getting listed in blog directories for further help.

    It is worthwhile to link to other blogs you may own as well but doing this will not boost your page ranking particularly. Google is weighted to give a higher ranking to links from other high ranking blogs especially if they are relevant to the content of your blog. The higher the ranking of the site externally linking to yours the better. So essentially you can't just create a bunch of blogs and link to them with the expectation that your Google Page Rank will miraculously increase overnight. Far better to spend your time concentrating on creating a small group of links to quality sites with a high Google Page Rank than going all over the net creating links to low ranking sites.

  5. Another aspect to consider when building quality external links is to ensure that your keywords and phrases appear in links which point to your site. Google analyzes these links so have the linking text contain your keywords to get the most out of them.

Check the Ranking of Your Blogger Blogspot Blog in Alexa
Alexa.com is a website that measures the traffic levels of websites. An Alexa rank is measured according to the amount of users visiting your website with the Alexa toolbar installed and takes into account page views, number of users and three months of historical data.

The Alexa rank is measured according to the amount of users who’ve visited a website with the Alexa toolbar installed. This is kind of an odd way to measure traffic but that is how it works. However it is a well established measure of the value of your site against others so it is useful to see how highly your blog is rated in Alexa. Provided your blog has been around a month or two you can check out how your blog is ranked by visiting Alexa's site info page

Visit Alexa Site Info Page to check the rank of your Blogger Blogspot blog

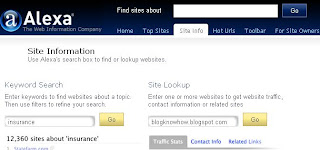
Alexa supplies you with statistics and information about your blog's traffic and ranking in handy graphical format


If you want your Blogger Blogspot blog to improve its Google Page Ranking concentrate on building quality external links. Google likes it when your site is getting linked to by other sites. The more the content is related the better. In this article I have given you some pointers about how to boost the Google Page Ranking of your Blogger Blogspot blog. If you have time let me know how you get on. Particularly how quickly you got off the Google Page Rank of 1 and how you did it. I'm sure other readers would be interested too.


Related Articles
List of Blog Know How Tutorials for Blogger Blogs
Blogger Blogspot SEO Tips and Tricks
How to Create Search Engine Friendly Permalinks for Blogger
Add Breadcrumb Navigation to Blogger Blogspot Blog
Add Meta Tags to Blogger Blogspot Blog for Better SEO
Adjust Blogger Title Tags for Better SEO
How to Add a Blogger Sitemap to Major Search Engines
Submit You Blogspot Blog to Yahoo
Add Blogger Sitemap to MSN Live
10 Tips to Build Traffic for Blogspot Blogger Blog
Get Your Blogger Blogspot Blog Listed in Blog Directories

Add Twitter Badge Button to Blogger

In this tutorial you will learn how to add a Twitter badge aka Twitter button to your Blogger Blogspot blog to link your blog to your Twitter account. By adding a Twitter button you will give your readers the option to follow your blog on Twitter.

Display a Twitter Icon in the Sidebar of Your Blogger Blog
If you look at the top of the right sidebar you will notice that I have placed a Twitter icon with a link to my Twitter profile. Adding the Twitter badge and link is not difficult and requires no change to the template. We will simply be adding a gadget to the sidebar. I have assumed no knowledge of Blogger and widgets so that absolute Blogger beginners can follow this tutorial.


1. Login to Blogger if not already logged in

2. Navigate to Layout > Page Elements

3. Click on Add a Gadget in the sidebar or other location eg the footer if you prefer

4. Select HTML/Javascript from the list of available gadgets

5. Paste the following code into the content box depending on your choice of button:


<a href="http://twitter.com/Your Profile"><img width="133" src="https://blogger.googleusercontent.com/img/b/R29vZ2xl/AVvXsEgsIQlAKHiMGaL1oMCuGD_iZc_Ja2QIyvGzavNowx_HN8AP8Fl7u7EABGw5MuwvxJwqswl_CRiluuC2CK-8q_-du-G7Qp56apj29Vi0EYp0dIv6VRvU0iuHO96nWIpMdfUwkXX56v4ASwI/s200/twitter-bar.gif" height="34" title="Follow Your Blog Name on Twitter"/></a><br/>


<a href="http://twitter.com/Your Profile"><img width="199" src="https://blogger.googleusercontent.com/img/b/R29vZ2xl/AVvXsEilmESljpDZgq6US5s696NHU4Q2P4NeNp99CUu5k7PtyA-jmXYKfSwbASX9J_R9Bf7DRdCqcZjhnOyS-Xyu8fj0OOK0M-79miRufJJG3emMr97vICds_9s673QHCOsYZvXbFbI-x2kXCtY/s200/twitter-35a.png" height="42" title="Follow Your Blog Name on Twitter"/></a><br/>


<a href="http://twitter.com/Your Profile"><img width="191" src="https://blogger.googleusercontent.com/img/b/R29vZ2xl/AVvXsEh0_Jr4GeFiL214RXp0_vQHrU4_PfdoM2vxlNGDD9AVIIOkaUJuSU_We4k0dJ5BXRkUb9ntH7FmmBs5sHdR_3LdwZmzhzz6YoleI-JdThpiYBXH25UliKPO4KXPl2mktkilo_D-X0nsFW4/s200/twitter-32a.png" height="58" title="Follow Your Blog Name on Twitter"/></a><br/>


6. Change Your Profile to your own Twitter profile. For example:

http://twitter.com/YourProfile

to

http://twitter.com/BlogWizz

7. Substitute your blog name in the title for your own blog name

title="Follow Your Blog Name on Twitter"

to

title="Follow Blog Know How on Twitter"

8. Click on Save.

9. Move your new Twitter widget to the desired location on your sidebar using drap and drop

10. Click on View Blog to admire your new Twitter button


In this tutorial you have learned how to add a Twitter button, badge, icon to your Blogger Blogspot blog so that readers can sign up to follow you on Twitter. I have supplied you with a choice of three different buttons to get you started. For more Twitter buttons try these free Twitter vector icons or these free Twitter graphics or just type Twitter icons into your favorite search engine

Related Articles
List of Blog Know How Tutorials for Blogger Blogs
Add Twitter Followers Counter to Blogger

Add Chitika Ads to Blogger Blogspot

In this tutorial you will learn how to add a Chitika ad unit to a Blogger Blogspot blog. To put a Chitika ad unit on a Blogger blog you will need to add the Chitika ad code directly into your Blogger template. Full instructions are set out below so that even beginner bloggers and Blogger newbies can follow these to install Chitika advertising program on their blog. If you are not already signed up for Chitika read about some of the advantages of advertising with Chitika at Blogspot Blogger Guide.


Chitika and Google Adsense - A Winning Combination
One of the main questions that bloggers ask about Chitika is can it be used with Google Adsense. The answer is most definitely yes. Chitika and Google Adsense can be used in conjunction as there is absolutely no conflict because Chitika ads unlike Google Adsense are non-contextual.

By adding Chitika to your blog you will increase your revenue from pay per click advertising. The CPMs are reputed to be higher than Google Adsense making it possible depending on your blog theme to make potentially higher earnings than with Google Adsense. For those looking for the highest possible earnings the new 550x250 mega units from Chitika are a particularly good choice if you have the space to display them. Best of all the earnings payout threshold for Chitika is only $10.00 making it a very achievable target for even the most modest blogger.

How to Add Chitika Advertisements to Blogger Blogspot Blog
Following these instructions will put a Chitika ad unit at the end of your blog posts but before the post footer details.

1. Sign up with Chitika Advertising Program and set up your ad unit following the online instructions

2. Highlight and copy the premium ad code. It needs to be parsed before entering it into the Blogger template so go ahead and paste it into the code window at Centricle.com and click on the encode button

Parse the Chitika Ad Code by using a Converter
3. Login to Blogger if not already logged in

4. Navigate to Layout > Edit HTML

5. Back up your template as a precaution by downloading it to your computer

6. Check the Expand Widgets Template box

7. Find the following line of code by entering it into the search tool (Use CTRL + F)

<p><data:post.body/></p>
or
<data:post.body/>

8. Copy the parsed Chitika code from Centricle.com and paste it into your Blogger template immediately after the above line

9. Click Save Template

10. Click on the View Blog link to view your ad unit. You will need to add the following to the end of the URL address in your browser to see your ad unit as ads are only served to North American visitors.

#chitikatest=yourkeyword

for instance I would enter

http://blogknowhow.blogspot.com#chitikatest=blog

to see how my ad unit would display ads for this keyword. Don't forget to refresh your page using CTRL + R

Summary
In this tutorial you have learned how to add a Chitika ad unit to your Blogger Blogspot blog. If you would like to start taking advantage of the Chitika advertising program on your blog and earn some extra money you can sign up to Chitika by following this link.

Tips and Troubleshooting
If you want to place your Chitika ad unit in another location other than below the post it is possible to add the code directly into a gadget in which case there is no need to parse it.


Get Chitika | Premium


Related Articles
Earn Money with Chitika and Blogger
List of Blog Know How Tutorials for Blogger Blogs

Add a Twitter Followers Counter to Blogger

In this tutorial you will learn how to place a Twitter Follower Counter on your Blogger Blogspot blog to display the number of followers you have on Twitter. A Twitter count button will encourage readers to follow you on Twitter much in the same way as putting a Feedburner subscriber counter on your blog will encourage new subscribers.

How To Place a Twitter Followers Counter on Blogger

1. Login to Blogger if not already logged in

2. Navigate to Layout > Page Elements

3. Click on the link to Add a Gadget to the sidebar or footer

4. Select HTML/Javascript from the list of gadgets

5. Paste the following script into the widget content box depending on the button your prefer:

Standard Button

<script type="text/javascript" language="javascript" src="http://twittercounter.com/embed/?username=yourTwitterusername"></script>


Black Button
Twitter Followers Counter Black Button
<script type="text/javascript" language="javascript" src="http://twittercounter.com/embed/?username=yourTwitterusername&style=black"></script>


Big Bird Button

<script type="text/javascript" language="javascript" src="http://twittercounter.com/embed/?username=yourTwitterusername&style=bird"></script>


If you would like to view more Twitter Counter badges you will find them at http://twittercounter.com/pages/buttons/

6. Replace the username with your own Twitter username. For example my username is blogwizz so I would enter username=blogwizz. If you are not already a member of Twitter sign up is a breeze

7. Enter a title for the widget if you wish

8. Click Save

9. Move your new widget into position on your sidebar by using Blogger's drag and drop feature

10. Click the View Blog link to admire your new Twitter Followers Counter


In this tutorial you have learned how to put a Twitter Followers Counter on your Blogger Blogspot blog so that you can display an accurate count of your Twitter followers. This will encourage other readers to begin following you on Twitter.


Related Articles
List of Blog Know How Tutorials for Blogger Blogs

Add Email This Post Link to Blogger

In this article you will learn how to place an email this post link or button at the bottom of each post in a Blogger Blogspot blog.

You may have noticed that some blogs give readers the option below their posts to email the article to themselves or a friend via a link or button. This affords readers yet another way to have access to your posts and a link for them to find you if they want to call back.

This email link should not be confused with the subscribe by email link which once a reader is signed up to will give them regular updates of each post you publish. This email link on the other hand only emails the reader the single post they are interested in.

There are several ways to place an email this post link on your Blogger Blogspot blog. Here are three methods known to me.

Add Email This Post to Blogger - Method 1
The easiest method. Adds an email button to the end of each post.

1. Login to Blogger if not already logged in

2. Navigate to Layout > Page Elements

3. Within the template click the Edit link on Blog Posts

Add Email This Post Button to Blogger
4. A pop up menu will open. Under Select Items check the box labelled Show Email Post Links

5. Click Save

6. Click on View Blog and scroll to the end of your post to see the envelope button which has now appeared.


Add Email This Post to Blogger - Method 2
Another method of adding an email this post link to your blog is to add an all-in-one social bookmarking button to your Blogger Blogspot blog. All in one social bookmarking buttons are minimalist and reduce the clutter of having lots of buttons. Read the following article for information about how to add an Add This Social Bookmarking Button to your Blogger blog


Add Email This Post to Blogger - Method 3
By far the most advanced method and requires a change to your Blogger template. Yet another way to add an email this post link to your Blogger blog is to make use of your Feedburner FeedFlare if you have one. For information about getting a Feedburner FeedFlare for a Blogger feed and configuring it please refer to my article Add a Feedburner FeedFlare to a Blogger Feed

Assuming that you already have a burned feed at Feedburner (if not then read my article on how to Burn a Blogger RSS Feed at Feedburner and a FeedFlare set up follow these instructions to add an email this post link.

1. Click the My Account link at the top right corner of the Blogger navbar and then select Feedburner from the list of Google services or sign in to Feedburner directly.

2. Select your blog feed from the My Feeds List on the My Feeds page

3. From the Feedburner dashboard select the Optimize tab.

4. From the left sidebar menu select FeedFlare

5. On the FeedFlare page enable Email This by checking the box under the Site column. (Note the first column is what appears in the feed and the second column is what will appear on your blog). If you don't have your FeedFlare set up yet you can set up the FeedFlare options for both site and feed together at the same time. Follow my article about adding a Feedburner FeedFlare to Blogger for more on this.

Select Email This from the Site Column on Feedburner FeedFlare page
6. Once you have checked the Email This option under Site and added any other options to the FeedFlare in the feed or site that you would like then click on Save. If this is a new FeedFlare then you will click on a button marked Activate instead.


7. After activating or saving you need to get the code to add to Blogger. Do this by clicking on the dropdown menu labelled Get the HTML code to put FeedFlare on your site and selecting Blogger from the list.

8. A pop up window entitled Adding FeedFlare to your Blogger blog will open with instructions on how to make the necessary changes to your blog. These are a bit confusing so I will break them down a bit here. Don't close this window yet as we will return

9. Login into Blogger if not already logged in

10. Navigate to Layout > Edit HTML.

11. Check the Expand Widgets Template

12. As a precaution back up you template

13. Scroll down to the following code or use CTRL + F to bring up the search tool.

<div class='post-footer'>

Note assumes you are using layout in Blogger. If you don't have this code you are likely to be using a custom template and will need to read the advanced instructions. Any problems just ask.

14. Copy the layout code in the Feedburner pop up window and paste it directly below this line <div class='post-footer'>

15. Click Save Template to save changes

16. Click View Blog to see the link in the footer of your blog posts

Add Email This Link using Feedburner FeedFlare in Blogger

In this article I have suggested three different methods to add an Email This Post link to a Blogger Blogspot blog to give readers the option of emailing their favorite articles directly to themselves. If you get stuck or have problems with any of these methods please just ask and I will try to help.


Related Articles
Add Email Subscription Links to Your Blogger Blogspot Blog
Add a Social Bookmarking Button to your Blogger Blog
Add a Feedburner FeedFlare to a Blogger Feed
Burn a Blogger RSS Feed at Feedburner
List of Blog Know How Tutorials for Blogger Blogs

Add Printer Button or Link to Blogger Blogspot

Today's article will show you how to add a print button or printer link to your Blogger Blogspot blog. The facility to print a hard copy of a post may be important to some visitors especially if you are like me and publish lengthy posts. Adding a printer button or link will add to your blog's functionality and user friendliness.

The reason I am writing this article is in response to a reader who asked me how to print out posts without the sidebar showing up. All the suggested buttons and links print out the post only and not the sidebar, header or footer.

This tutorial involves changing the template code but is not difficult as long as you follow these step by step instructions.

How to Add a Custom Print Button to Your Blogger Blogspot Blog
The following instructions will place a printer button on each individual page of your blog below the post. Only the blog article itself will be printed along with any comments. The sidebar will not be printed.

Example of the printer button to be added: icons

1. Log in to Blogger if not already logged in

2. Navigate to Layout > Edit HTML

3. Back up your template by downloading full template to your computer

4. Check Expand Widgets Template

5. Bring up the search toolbar by using CTRL + F

6. Find this line by typing it into the search box:

<p><data:post.body/></p>

7. Now replace that line with the following code block:


<!-- Add Printer Button by http://blogknowhow.blogspot.com/-->
<span class='noprint'><p><data:post.body/></p></span>
<b:if cond='data:blog.pageType == &quot;item&quot;'>
<a href='javascript:window.print()'>
<img src='http://i1020.photobucket.com/albums/af326/bookwise77/printer-button.gif'/></a></b:if>
<!-- End Add Printer Button by http://blogknowhow.blogspot.com/-->


8. Click on Save Template to save changes

9. Click View Blog to see your button in action

Note: If you want to change the printer icon to your own icon upload your image to a photo storage service like Photobucket and note the URL address of the icon. Now substitute the URL address of the existing image for your image by changing the line beginning with <img src='
Change printer icon to this alternative printer icon icons

So to change the printer image to another printer image the code would look like:

<!-- Add Printer Button by http://blogknowhow.blogspot.com/-->
<span class='noprint'><p><data:post.body/></p></span>
<b:if cond='data:blog.pageType == &quot;item&quot;'>
<a href='javascript:window.print()'><img src='http://i1020.photobucket.com/albums/af326/bookwise77/printer-button-2.gif'/></a></b:if>
<!-- End Add Printer Button by http://blogknowhow.blogspot.com/-->


How to Add a Printer Link to a Blogger Blogspot Blog
You may not want a button and prefer to add a printer link instead. To do this you would follow steps 1 to 6 and then insert the following code instead of the code contained in step 7


<!-- Add Printer Link by http://blogknowhow.blogspot.com/-->
<p><span class='noprint'><data:post.body/></p></span>
<b:if cond='data:blog.pageType == &quot;item&quot;'>
<a href='javascript:window.print()'>Print this post</a>
</b:if>
<!-- End Add Printer Link by http://blogknowhow.blogspot.com/-->

Save the changes to your template and then navigate to an individual post to see your link at the bottom of the post.


How To Add a Combination of Printer Button and Link
If you would like to display a printer button along with a link follow steps 1 to 6 and then insert the following code instead of the code contained in step 7


<!-- Add Combined Printer Button and link by http://blogknowhow.blogspot.com/-->
<span class='noprint'><p><data:post.body/></p></span>
<b:if cond='data:blog.pageType == &quot;item&quot;'>
<span style='background: url(http://i1020.photobucket.com/albums/af326/bookwise77/printer-button.gif) left no-repeat; padding-left: 28px;'>
<a href='javascript:window.print()'>Print this post</a></span>
</b:if>
<!-- End Add Combined Printer Button and link by http://blogknowhow.blogspot.com/-->


In this article I have shown you how to add a print button, a print link and a combined button and link to the bottom of your Blogger Blogspot posts. Enjoy!


Related Articles
List of Blog Know How Tutorials for Blogger Blogs

Add Banner Adsense Above Blogger Header

One of my readers asked me how to add a Google Adsense ad unit above the header of a Blogger Blogspot blog. Rather than post a long reply I decided to write an article about it so that others looking for help to place an affiliate banner or Google Adsense banner at the top of their blog will find the solution more easily.

To set up Blogger so that ad units can be placed above the header requires the addition of a snippet of code to your Blogger Template. I have aimed this tutorial at beginners and newbies to Blogger. The tweak can be performed in less than 5 minutes.

How to Add Google Adsense or an Affiliate Banner Above Blogger Blogspot Header
How to Add a Google Adsense Ad Unit or an Affiliate Banner Above the Blogger Header

1. Login to Blogger if not already logged in

2. Navigate to Layout > Edit HTML

3. As a precaution back up your template by downloading the full template to your computer

4. Tick the Expand Widget Templates box

5. Using CTRL + F to bring up the search box find this line which in most templates will be directly after <body> tag

<div id='outer-wrapper'>

6. Paste this block of code after this line to create a new section

<div id='topads-wrapper'>
<b:section class='topads' id='topads' preferred='yes'/>
</div>

7. Next we need to add some CSS styling to the new section. Please note that the banner will be centered by default. If you want to change the alignment for some reason you just need to change the CSS styling.

Place the following code in the head section of your template before these lines:
]]></b:skin>
</head>


/* Top Ads
----------------------------------------------- */
#topads-wrapper {
margin: 0;
padding: 0;
position: relative;
text-align: center;
width: 100%;
}

#topads {margin: 0; padding: 0;}

#topads .widget {margin: 0; padding: 5px 0;}

8. Click the Save Template button

9. Go to Layout > Page Elements

10. You will now see that you can add a gadget to a new section above your header and directly below the navbar.

11. To Add a Google Adsense Ad Unit
Click on Add a Gadget and choose your desired Google Adsense ad unit. If you are uncertain how to add a Google Adsense ad unit to Blogger read my article Google Adsense Tips for Blogger Blogs

To Add an Affiliate Banner
Or if you want to add an affiliate banner then you would click on Add a Gadget and choose a HTML/Javascript widget from the list of gadgets available in the menu. You would then paste the affiliate banner code into the content box in the popup window and save your changes. Click on View Blog and you will see your new banner displayed above your blog's header. For more detailed instructions about adding affiliate banners to a Blogger Blogspot blog please refer to my article Add an Affiliate Banner to the Blogger Sidebar


Tips and Troubleshooting
  • If you wish to add more than one widget to the section you will need to change the template code:

    from
    <b:section class='topads' id='topads' preferred='yes'/>

    to:
    <b:section class='topads' id='topads' maxwidgets='3'>

    This change to the template will allow you to add up to 3 widgets above the Blogger header.


  • If you wish to display your Google Adsense ad unit only on the post page and not the home page then you need to add an if statement. For instance go to Layout > Edit HTML after you have created your ad unit and you will see that the code you inserted is now different. That is because the Adsense widget code has been added. You are likely to have something that looks like this:

    <b:section class='topads' id='topads' preferred='yes'/>
    <b:widget id='AdSense7' locked='false' title='' type='AdSense'>
    <b:includable id='main'>
    <div class='widget-content'>
    <data:adCode/>
    </div>
    </b:includable>
    </b:widget>
    </b:section>

    By inserting the code within an if statement we can control where it appears. To have the Google Adsense ad unit only display on the post page add these lines of code:

    <b:section class='topads' id='topads' preferred='yes'/>
    <b:widget id='AdSense7' locked='false' title='' type='AdSense'>
    <b:includable id='main'>
    <div class='widget-content'>
    <b:if cond='data:blog.pageType == "item"'>
    <data:adCode/>
    </b:if>
    </div>
    </b:includable>
    </b:widget>
    </b:section>

In today's tutorial you have learned how to create a new section above the Blogger Blogspot header and how to add a Google Adsense ad unit to that spot or an affiliate banner. You have also learned how to place that Google Adsense unit or banner only on the post page rather than on every page on your blog. Any questions please ask.


Related Articles
List of Blog Know How Tutorials for Blogger Blogs
Blogspot Blogger Guide to Google Adsense Placement
Google Adsense Tips for Blogger Blog
Add an Affiliate Banner to the Blogger Sidebar