Popular Posts

Showing posts with label Blogger Widgets. Show all posts

Awesome NetOopsblog Subscription Widget for blogger

NetOopsblog Subscription box Blogger
This post is about how to add a Subscription Box like our NetOops blog. Subscription box contains Facebook, Twitter, RSS Feed, e-mail subscription. This widget is based on a wooden theme. Facebook, Twitter, RSS Feed links are shown as Natural Wooden Sticky Boards. In this tutorial i am adding a new e-mail subscription box with wooden theme.


Subscription box with Fully Wooden Theme

  • Go to Blogger Dashboard
  • Go to Layout 
  • Select Add a Gadget
  • You can type title any
  • And Copy the following code in the content.
Demo of Fully Wooden Theme

 Important: If you don't want Mouse over effect of Images in the Subscription box, please delete the RED highlighted code,. If you want then leave it there.
    <style type="text/css">
     /* Delete form Here*/ 
    img.beintouch:hover {
        background: none repeat scroll 0 0 #D6D6D6;
        border-radius: 16px 16px 16px 16px;
        box-shadow: 0 0 10px #565656;
    }
    /* Delete to Here*/
    .emailtext {
        background: url("https://blogger.googleusercontent.com/img/b/R29vZ2xl/AVvXsEgUCt4P5Z15Lvq1akQzfnaT4F8Lyqb5HoXx18H3PpbHC4ocxcEIFocQYGsaD_U5i5jzKm_ZFC4KG7K_4ZNfUGp75EdJBOC-ov-GshFudlFTb8Bl0kqQahBFPsJllo0viB2eOrlKeMSQosY/s1600/mailbox.png") no-repeat scroll 4px center transparent;
        border: 1px solid #7E4E27;
        border-radius: 4px 4px 4px 4px;
        box-shadow: 1px 1px 4px #7E4E27 inset;
        color: #444444;
        font-weight: bold;
        margin-left: 2px;
        padding: 7px 15px 7px 35px;
        text-decoration: none;
        width: 176px;
    }
    .ebutton {
        background: -moz-linear-gradient(-45deg, #3C1F0E 0%, #D28A47 30%, #F9E183 30%, #D28A47 55%, #3C1F0E 100%) repeat scroll 0 0 transparent;
        border: 1px solid #D3D3D3;
        border-radius: 4px 4px 4px 4px;
        color: #FFFFFF;
        cursor: pointer;
        font-weight: bold;
        margin-left: -18px;
        margin-top: 5px;
        padding: 6px 15px;
        text-decoration: none;
        text-shadow: 1px 1px 0 #000000;
    }
    </style>
    <table align="center" width="317px" cellspacing="0px" cellpadding="1px"><tbody><tr><td><a target="_blank" rel="nofollow" href="http://www.facebook.com/pages/NetOops-Blog/159796530791611"><img src="https://blogger.googleusercontent.com/img/b/R29vZ2xl/AVvXsEjba3-L8fSJKnlzvyf24LpXqH8BRH2_BxOv230BqnwL3PRB3zS9s4iKD2MYfQUVSChcFIsP_Mu6AfOI6-vd-0b7OaLpnHXvjiAd8kPuggl1YmJ8Of6olIZOWubsWjR3rVrTVRWwa4UxuLk/s1600/woden+board+facebook_netoops.png" class="beintouch" /></a></td><td><a target="_blank" href="http://twitter.com/netoopsblog/" rel="nofollow"><img src="https://blogger.googleusercontent.com/img/b/R29vZ2xl/AVvXsEja4Ibqa-DnPYOyYGPKAMQYfXCCr8J-c4K21rdaWaOGW5hM7n-yOp2LzgSY9FJ6QCm7clf6Fs0IJhffbTTYqcJCwXqb93L0lEdp0zU0X7AzMcvX7hHZpOM4QIq-Ro_Y9ORd2rSgJ232T5E/s1600/woden+board+twitter_netoops.png" class="beintouch" /></a></td><td><a target="_blank" href="http://feeds.feedburner.com/NetOopsBloggerTricks" rel="nofollow"><img src="https://blogger.googleusercontent.com/img/b/R29vZ2xl/AVvXsEjEirXbko2EdmtS2-g_J5GWnSCfQJHB9kizMZp5b_zjnfuWkxAzyu4ZLZgLOWdZyicfjOmGNAsVqdl-Iq99vojaPBZACv9U0pqG4OZlsiMFzgbNcOQdfq5Xh5OPPgUWUneOlwpPlcFWuvE/s1600/woden+board+RSS1_netoops.png" class="beintouch" /></a><a href="http://netoopsblog.blogspot.com"></a></td></tr></tbody></table>
    <div>Get Latest Tips via e-mail</div>
    <form target="popupwindow" style="margin: 0pt;" onsubmit="window.open('http://feedburner.google.com/fb/a/mailverify?uri=netoopsbloggertricks', 'popupwindow', 'scrollbars=yes,width=550,height=520');return true" method="post" class="emailform" action="http://feedburner.google.com/fb/a/mailverify">
    <input type="hidden" value="NetOopsBloggerTricks" name="uri" />
    <input type="hidden" value="en_US" name="loc" />
    <input type="text" value="Enter your email..." onfocus="if (this.value == &quot;Enter your email...&quot;) {this.value = &quot;&quot;}" onblur="if (this.value == &quot;&quot;) {this.value = &quot;Enter your email...&quot;;}" name="email" class="emailtext" />
    <input type="submit" value="Subscribe" title="" class="ebutton" alt="" />
    </form>


    Change the BLUE highlighted code with FACEBOOK PAGE URL, TWTTER, FEED URL, FEED ID respectively.

    Subscription box with Default Basic Wooden theme

    • Go to Layout 
    • Select Add a Gadget
     Important: If you don't want Mouse over effect of Images in the Subscription box, please delete the RED highlighted code,. If you want then leave it there.
    <style type="text/css">
     /* Delete form Here*/ 
    img.beintouch:hover {
        background: none repeat scroll 0 0 #D6D6D6;
        border-radius: 16px 16px 16px 16px;
        box-shadow: 0 0 10px #565656;
    }
    /* Delete to Here*/
    </style>
    <table align="center" width="317px" cellspacing="0px" cellpadding="1px"><tbody><tr><td><a target="_blank" rel="nofollow" href="http://www.facebook.com/pages/NetOops-Blog/159796530791611"><img src="https://blogger.googleusercontent.com/img/b/R29vZ2xl/AVvXsEjba3-L8fSJKnlzvyf24LpXqH8BRH2_BxOv230BqnwL3PRB3zS9s4iKD2MYfQUVSChcFIsP_Mu6AfOI6-vd-0b7OaLpnHXvjiAd8kPuggl1YmJ8Of6olIZOWubsWjR3rVrTVRWwa4UxuLk/s1600/woden+board+facebook_netoops.png" class="beintouch" /></a></td><td><a target="_blank" href="http://twitter.com/netoopsblog/" rel="nofollow"><img src="https://blogger.googleusercontent.com/img/b/R29vZ2xl/AVvXsEja4Ibqa-DnPYOyYGPKAMQYfXCCr8J-c4K21rdaWaOGW5hM7n-yOp2LzgSY9FJ6QCm7clf6Fs0IJhffbTTYqcJCwXqb93L0lEdp0zU0X7AzMcvX7hHZpOM4QIq-Ro_Y9ORd2rSgJ232T5E/s1600/woden+board+twitter_netoops.png" class="beintouch" /></a></td><td><a target="_blank" href="http://feeds.feedburner.com/NetOopsBloggerTricks" rel="nofollow"><img src="https://blogger.googleusercontent.com/img/b/R29vZ2xl/AVvXsEjEirXbko2EdmtS2-g_J5GWnSCfQJHB9kizMZp5b_zjnfuWkxAzyu4ZLZgLOWdZyicfjOmGNAsVqdl-Iq99vojaPBZACv9U0pqG4OZlsiMFzgbNcOQdfq5Xh5OPPgUWUneOlwpPlcFWuvE/s1600/woden+board+RSS1_netoops.png" class="beintouch" /></a><a href="http://netoopsblog.blogspot.com"></a></td></tr></tbody></table>
    <div>Get Latest Tips via e-mail</div>
    <form target="popupwindow" style="margin: 0pt;" onsubmit="window.open('http://feedburner.google.com/fb/a/mailverify?uri=netoopsbloggertricks', 'popupwindow', 'scrollbars=yes,width=550,height=520');return true" method="post" class="emailform" action="http://feedburner.google.com/fb/a/mailverify">
    <input type="hidden" value="NetOopsBloggerTricks" name="uri" />
    <input type="hidden" value="en_US" name="loc" />
    <input type="text" value="Enter your email..." onfocus="if (this.value == &quot;Enter your email...&quot;) {this.value = &quot;&quot;}" onblur="if (this.value == &quot;&quot;) {this.value = &quot;Enter your email...&quot;;}" name="email" class="emailtext" />
    <input type="submit" value="Subscribe" title="" class="ebutton" alt="" />
    </form>


    Change the BLUE highlighted code with FACEBOOK PAGE URL, TWTTER, FEED URL, FEED ID respectively.

    I think this widget helps you, Please share and like...

    15+ Smooth Jquery Scroll to Top widget generator for Blogger v.1

    jquery scroll to top widget generator blogger
    Jquery scrolling to top buttons help visitors to jump to top of page with smooth automatic scrolling.So the user/visitor of your blog can go to top of page with a single click.This smooth jquery scrolling makes your blog impressive.
    I created a Blogger widget generator for ease of use.Create your favorite scroll to top Button with a single click.


    To view demo look at right-bottom of this blog or Click on the following link


    I think you liked this generator,Check out our other awesome widget generators here.
    Don't forget to say thanks at least for appreciating us..  Also expect more form us.. thanks..

    Spraying animated subscription buttons for blogger v.1

    spraying animated subscription buttons blogger
    Spraying jQuery animated subscription buttons widget is an awesome widget for blogger.This animated subscription buttons created by Redeyeoperations and i modified it by adding some additional features.This widget works best in Mozilla Firefox..
    I created a widget generator for you with some important options.


    To view demo of this widget please click on following link

    Features

    • 5 subscription buttons
    • jQuery Animation
    • Effective CSS3 Animation
    • Color Selectable base button
    View Demo
    Step 1: Add jQuery plugin (if your blog have a jquery plugin,ignore this step)
    • Go to Template->Edit HTML [A dialog box appears click Proceed]
    • Copy and paste the below code <head> and save it
    <script src='http://ajax.googleapis.com/ajax/libs/jquery/1.7.1/jquery.min.js' type='text/javascript'/>


      Google +1 button and Badge for Blogger

      Google +1 button and Badge for blogger
      Google's new GPlus +1 button for blogger,that lets to share your blog with like minded people across the world. Blogger introduces two Google+ gadgets (+1 Button and Google+ Badge) .Google+ button is almost same as Facebook Like button.Unlike the Google+ button appears below the post,the gadget is specific to your blog.Google+ gadget allows your visitors to recommend your blog and able to share on their circles.
      Here i am going to show how to add this gadgets..


      • Sig in to your Blogger
      • Go to Layout and click Add Gadget
       
      Google +1 button and Badge 
      • Take +1 button or Google+ Badge as you need
      • If you take Google+ badge give page ID
      Google +1 button and Badge
      •   Thats all....

      Facebook jQuery POP OUT likebox widget generator

      facebook likebox widget
      I had developed a Facebook Static popout jquery effect Like box generator for you.This Widget Generator let's you easily generaate your favorite Facebook style Widget and also easily add to your Blogger Blog.In my previous Article (How to Add a Static Facebook jQuery Pop out Widget) I told you about Static Facebook POP OUT Widget installation manually.Use this Widget generator and Enjoy..!


      Step 1: Add jQuery plugin (if your blog have a jquery plugin,ignore this step)
      • Go to Design->Edit HTML[Template->Edit HTML in new blogger interface]
      • Copy below code inside <head>
      <script src='http://ajax.googleapis.com/ajax/libs/jquery/1.7.1/jquery.min.js' type='text/javascript'/>
      • Go to Design-> Page Elements
      • Click add gadget and select HTML/javascript
      • Copy and paste the generated code inside it and save it.


      This is my first widget generator,also expect more other awesome widget generators from us.If you enjoyed this widget Generator please please share n like us..

      Stylish Static animated Flash Clock for Blogger

      stylish clock blogger
      Here I am saying about How to Add a Stylish Flash Animated Clock to your Blogger Blog.Here is a huge collection of Clock widgets for your taste.Follow the Simple Steps below to make your Blog Stylish,Cool, and Smart looking Blog.


      • First of all SignIn to your Blogger Account 
      • Select Design->Page Elements
      • Click on Add Gadget
      • Select HTML/javascript from it,then copy the code of clock you want.
       

        Step 1: If you want a NON Static Clock Widget,then Just copy and paste the code to HTML/javascript content.

        If you want a cool static clock,then first do the step above and Click HERE

        Add Stylish Flash Clock 1


        • If you want to add this Clock,then Copy  and paste the below code
        <div class="noop-clock"><center><embed height="140" src="http://www.hitarek.com/clock/clock24-6.swf?TimeZone=IST&amp;Place=&amp;" type="application/x-shockwave-flash" width="210"></embed></center><center><a style="font-size: 3mm" target="_blank" href="http://www.hitarek.com">Free Clock</a></center></div>

        Add Stylish Flash Clock 2


        • If you want to add this Clock,then Copy  and paste the below code
        <div class="noop-clock"><center><!-- hitarek.com --><embed width="210" src="http://www.hitarek.com/clock/clock24-2.swf?TimeZone=IST&Place=&" height="140"  type="application/x-shockwave-flash"></embed></center><center><a style="font-size: 3mm" target="_blank" href="http://www.hitarek.com">Free Clock</a></center></div>

        Add Stylish Flash Clock 3


        • If you want to add this Clock,then Copy  and paste the below code
        <div class="noop-clock"><center><!-- hitarek.com --><embed width="120" src="http://www.hitarek.com/clock/clock5-1.swf?TimeZone=IST&Place=&" height="230" wmode="transparent" type="application/x-shockwave-flash"></embed></center><center><a style="font-size: 3mm" target="_blank" href="http://www.hitarek.com">Free Clock</a></center></div>

        Add Stylish Flash Clock4


        • If you want to add this Clock,then Copy  and paste the below code
        <div class="noop-clock"><center><embed height="230" src="http://www.hitarek.com/clock/clock5-2.swf?TimeZone=IST&amp;Place=&amp;" type="application/x-shockwave-flash" width="120" wmode="transparent"></embed></center><center><a style="font-size: 3mm" target="_blank" href="http://www.hitarek.com">Free Clock</a></center></div>

        Add Stylish Flash Clock4


        • If you want to add this Clock,then Copy  and paste the below code
        <div class="noop-clock">
        <center><iframe allowtransparency="true" frameborder="0" height="148" hspace="0" marginheight="0" marginwidth="0" scrolling="no" src="http://www.hitarek.com/animation/dolls5.html" vspace="0" width="100"></iframe></center><center><a href="http://netoopsblog.blogspot.com/" style="font-size: 2mm;" target="_blank">FreeWidgets</a></center></div><center><a style="font-size: 3mm" target="_blank" href="http://www.hitarek.com">Free Clock</a></center>


        Add Stylish Flash Clock5


        • If you want to add this Clock,then Copy  and paste the below code
        <div class="noop-clock">
        <center><!-- hitarek.com --><embed width="130" src="http://www.hitarek.com/clock/clock11-4.swf?TimeZone=IST&Place=&" height="130" wmode="transparent" type="application/x-shockwave-flash"></embed></center><center><a style="font-size: 3mm" target="_blank" href="http://www.hitarek.com">Free Clock</a></center></div>

        Add Stylish Flash Clock6


        • If you want to add this Clock,then Copy  and paste the below code
        <div class="noop-clock">
        <center><!-- hitarek.com --><embed width="160" src="http://www.hitarek.com/clock/clock25-9.swf?TimeZone=IST&Place=&" height="160" wmode="transparent" type="application/x-shockwave-flash"></embed></center><center><a style="font-size: 3mm" target="_blank" href="http://www.hitarek.com">Free Clock</a></center>

        </div>

        Add Stylish Flash Clock#


        • If you want to add this Clock,then Copy  and paste the below code
        <div class="noop-clock">
        <center><!-- hitarek.com --><embed width="140" src="http://www.hitarek.com/clock/clock22-5.swf?TimeZone=IST&Place=&" height="180"  type="application/x-shockwave-flash"></embed></center><center><a style="font-size: 3mm" target="_blank" href="http://www.hitarek.com">Free Clock</a></center>
        </div>

        Add Stylish Flash Clock 7


        • If you want to add this Clock,then Copy  and paste the below code
        <div class="noop-clock">
        <object><param name="movie" value="http://flash-clocks.com/free-flash-clocks-for-websites/free-flash-clock-24.swf"><embed src="http://flash-clocks.com/free-flash-clocks-for-websites/free-flash-clock-24.swf" width="150" height="150" wmode="transparent"> </embed></object>
        </div>

        Add Stylish Flash Clock 8


        • If you want to add this Clock,then Copy  and paste the below code
        <div class="noop-clock">
        <object><param name="movie" value="http://flash-clocks.com/free-flash-clocks-for-websites/free-flash-clock-15.swf"><embed src="http://flash-clocks.com/free-flash-clocks-for-websites/free-flash-clock-15.swf" width="150" height="150" wmode="transparent"> </embed></object>
        </div>

        Add Stylish Flash Clock 9


        • If you want to add this Clock,then Copy  and paste the below code
        <div class="noop-clock">
        <embed src=http://flash-clocks.com/free-flash-clocks-blog-topics/free-flash-clock-175.swf width=200 height=200 wmode=transparent type=application/x-shockwave-flash></embed>
        </div>

        Add Stylish Flash Clock 10


        • If you want to add this Clock,then Copy  and paste the below code
        <div class="noop-clock">
        <embed src=http://flash-clocks.com/free-flash-clocks-blog-topics/free-flash-clock-150.swf width=200 height=200 wmode=transparent type=application/x-shockwave-flash></embed>
        </div>

        Add Stylish Flash Clock@


        • If you want to add this Clock,then Copy  and paste the below code
        <div class="noop-clock">
        <object><param name="movie" value="http://flash-clocks.com/free-flash-clocks-for-websites/free-flash-clock-63.swf"><embed src="http://flash-clocks.com/free-flash-clocks-for-websites/free-flash-clock-63.swf" width="150" height="150" wmode="transparent"> </embed></object>
        </div>


        Add a Static Clock

        Step 2:
        • Copy and Paste the CSS code below after the code of clock.
        <style type="text/css">.noop-clock {
        position: fixed;
        right: 0%;
        top: 0%;
        padding: 3px 7px;
        box-shadow: -2px 2px 6px;

        }</style>
        •  Then click on Save.
        With this tutorial you have got a Beautiful Clock.
        If you feel any confusion or doubt then please do comment.

        Facebook Static Pop Out Like Box with jQuery Effect for Blogger

        facebook pop out likebox
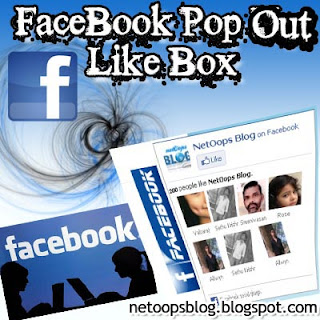
         Here is a Tutorial about how to add a static Pop out Like Box with Cool jQuery hover effect.This a Awesome Blogger Blog Widget that adds a little beauty to your blog.

        After installing this Widget a Facebook Logo will appear on the right side of your Blog.When you Mouse over that Logo it Pop out with Smooth jQuery Effect.

        Follow the instructions for installing this Widget.


        If you don't interested in Editing HTML,you can use our WIDGET GENERATOR.

        Install Facebook Pop Out Like Box Widget

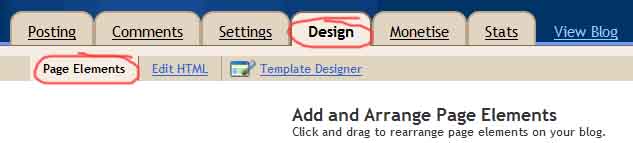
        • Go to Design-> Page Elements
        • Click on Add Gadget
        page elements blogger
        • Select HTML/Javascript from it
        • Leave title as blank ,Copy and Paste the below code into the content section.

        <script type="text/javascript">
        /*<![CDATA[*/
        jQuery(document).ready(function() {jQuery(".noopslikebox").hover(function() {jQuery(this).stop().animate({right: "0"}, "medium");}, function() {jQuery(this).stop().animate({right: "-250"}, "medium");}, 500);});
        /*]]>*/
        </script>
        <style type="text/css">
        .noopslikebox{background: url("https://blogger.googleusercontent.com/img/b/R29vZ2xl/AVvXsEj4E3u2MtF3twLF9GxmK7UCWX-Rq5UNgBHr_2SiZwA4cw1YcZCV9xS7zolQ2XtMWRUDTLKKSfVCLp72PY-vsCvvS-KNyxtjpjMgEfeBGwA8uXGhPPq_A5_NDTq03RsyQxxuNDR9ZWXBXZc/s1600/fb_static+button.jpg") no-repeat scroll left center transparent !important;display: block;float: right;height: 270px;padding: 0 5px 0 46px;width: 245px;z-index: 999;position:fixed;right:-250px;top:20%;}
        .noopslikebox div{border:none;position:relative;display:block;}
        .noopslikebox span{bottom: 12px;font: 8px "lucida grande",tahoma,verdana,arial,sans-serif;position: absolute;right: 7px;text-align: right;z-index: 999;}
        .noopslikebox span a{color: gray;text-decoration:none;}
        .noopslikebox span a:hover{text-decoration:underline;}
        </style>
        <div class="noopslikebox">
            <div>
            <iframe src="http://www.facebook.com/plugins/likebox.php?href=http://www.facebook.com/pages/NetOops-Blog/159796530791611&amp;width=245&amp;colorscheme=light&amp;show_faces=true&amp;connections=9&amp;stream=false&amp;header=false&amp;height=270" scrolling="no" frameborder="0" scrolling="no" style="border: medium none; overflow: hidden; height: 270px; width: 245px;background:#fff;"></iframe>
            </div>
        </div>
        • Replace the RED highlighted text with your Facebook page URL.
        I hope you'd liked this Article,if so please share, like this. 

        Add Flying Letters below Mouse Pointer Animation

        flying letters below mouse
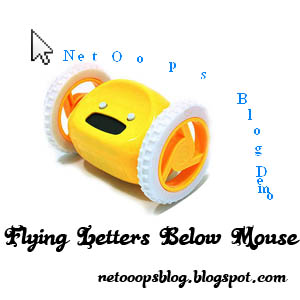
        How to setup flying letters below mouse pointer.This a simple article that Spice your Blog.After inserting this Code,When you move mouse over your Blog, you will see that Letters you SET in the below code will flying like a Animation.


        Install Flying Letters Below Mouse Widget

        Make sure you had Backed up your Template(How To BackUp Template?)

        • Sign In to your Blogger Account
        • Go to Design->Edit HTML
        • Find </body> (Find Easily Using Ctrl+F) and Copy and Paste the below Code
        <script type="text/javascript">
        var text=&#39; ENTER YOUR FLYING TEXT HERE &#39;;
        </script>
        <script src="http://netoopscodes.googlecode.com/svn/branches/Js%20files/mousetail.js" type="text/javascript">
        </script>
        • Save it,its all.....you are almost done.

        Awesome Rainbow animation Link Widget for Blogger

        This is a simple Blogger Blog Trick,Changing the color of Link when Mouse over it.7 colors are changing like animation when hover the link.
        Follow the simple steps below..


        If you are a beginner in HTML editing,Use our 1 Click Widget Below(Click Add to Blogger Button below)


        Install Rainbow Animation Hover Effect manually.

        Note:Remember that Back up your Template First.(How to Backup Template)

        • Sign In to you Blogger Account.
        • Go to Design->Edit HTML
        • Find <head> section and Place the below code inside it.

        <script type='text/javascript'>
        //<![CDATA[
        var rate = 20;
        if (document.getElementById)
        window.onerror=new Function("return true")
        var objActive;  // The object which event occured in
        var act = 0;    // Flag during the action
        var elmH = 0;   // Hue
        var elmS = 128; // Saturation
        var elmV = 255; // Value
        var clrOrg;     // A color before the change
        var TimerID;    // Timer ID
        if (document.all) {
        document.onmouseover = doRainbowAnchor;
        document.onmouseout = stopRainbowAnchor;
        }
        else if (document.getElementById) {
        document.captureEvents(Event.MOUSEOVER | Event.MOUSEOUT);
        document.onmouseover = Mozilla_doRainbowAnchor;
        document.onmouseout = Mozilla_stopRainbowAnchor;
        }
        function doRainbow(obj)
        {
        if (act == 0) {
        act = 1;
        if (obj)
        objActive = obj;
        else
        objActive = event.srcElement;
        clrOrg = objActive.style.color;
        TimerID = setInterval("ChangeColor()",100);
        }
        }
        function stopRainbow()
        {
        if (act) {
        objActive.style.color = clrOrg;
        clearInterval(TimerID);
        act = 0;
        }
        }
        function doRainbowAnchor()
        {
        if (act == 0) {
        var obj = event.srcElement;
        while (obj.tagName != 'A' && obj.tagName != 'BODY') {
        obj = obj.parentElement;
        if (obj.tagName == 'A' || obj.tagName == 'BODY')
        break;
        }
        if (obj.tagName == 'A' && obj.href != '') {
        objActive = obj;
        act = 1;
        clrOrg = objActive.style.color;
        TimerID = setInterval("ChangeColor()",100);
        }
        }
        }
        function stopRainbowAnchor()
        {
        if (act) {
        if (objActive.tagName == 'A') {
        objActive.style.color = clrOrg;
        clearInterval(TimerID);
        act = 0;
        }
        }
        }
        function Mozilla_doRainbowAnchor(e)
        {
        if (act == 0) {
        obj = e.target;
        while (obj.nodeName != 'A' && obj.nodeName != 'BODY') {
        obj = obj.parentNode;
        if (obj.nodeName == 'A' || obj.nodeName == 'BODY')
        break;
        }
        if (obj.nodeName == 'A' && obj.href != '') {
        objActive = obj;
        act = 1;
        clrOrg = obj.style.color;
        TimerID = setInterval("ChangeColor()",100);
        }
        }
        }
        function Mozilla_stopRainbowAnchor(e)
        {
        if (act) {
        if (objActive.nodeName == 'A') {
        objActive.style.color = clrOrg;
        clearInterval(TimerID);
        act = 0;
        }
        }
        }
        function ChangeColor()
        {
        objActive.style.color = makeColor();
        }
        function makeColor()
        {
        // Don't you think Color Gamut to look like Rainbow?
        // HSVtoRGB
        if (elmS == 0) {
        elmR = elmV;    elmG = elmV;    elmB = elmV;
        }
        else {
        t1 = elmV;
        t2 = (255 - elmS) * elmV / 255;
        t3 = elmH % 60;
        t3 = (t1 - t2) * t3 / 60;
        if (elmH < 60) {
        elmR = t1;  elmB = t2;  elmG = t2 + t3;
        }
        else if (elmH < 120) {
        elmG = t1;  elmB = t2;  elmR = t1 - t3;
        }
        else if (elmH < 180) {
        elmG = t1;  elmR = t2;  elmB = t2 + t3;
        }
        else if (elmH < 240) {
        elmB = t1;  elmR = t2;  elmG = t1 - t3;
        }
        else if (elmH < 300) {
        elmB = t1;  elmG = t2;  elmR = t2 + t3;
        }
        else if (elmH < 360) {
        elmR = t1;  elmG = t2;  elmB = t1 - t3;
        }
        else {
        elmR = 0;   elmG = 0;   elmB = 0;
        }
        }
        elmR = Math.floor(elmR).toString(16);
        elmG = Math.floor(elmG).toString(16);
        elmB = Math.floor(elmB).toString(16);
        if (elmR.length == 1)    elmR = "0" + elmR;
        if (elmG.length == 1)    elmG = "0" + elmG;
        if (elmB.length == 1)    elmB = "0" + elmB;
        elmH = elmH + rate;
        if (elmH >= 360)
        elmH = 0;
        return '#' + elmR + elmG + elmB;
        }
        //]]>
        </script>

        • Save It and Enjoy. . . !

        I think you enjoyed this post.Surely you will get excited after using this widget.

        Awesome Random Posts Widget for blogger Blog

        random posts widget
        Random Posts widget is an awesome widget for your Blogger Blog.Most important feature of this widget is it lets your Blog visitors to surf more blog posts in your blog.Surely it increases your Blog's internal links that lets your blog higher traffic.
        Its let your users to spend more time in your Blog.


        Install Random posts widget

        Make sure you are Sign In to your Blogger Account.

        If you are a beginner in Blogger Editing ,use our one click Widget
        • Click the below Add to Blogger Button to install

        Manually Add Random posts Widget

        • Sign In to your Blogger Account.
        • Go to Design->Page Elements
        • Click on Add Gadget and look for HTML/Javascript take it
        • Give the title as you need(eg:Random Posts)
        • Copy and paste the below code to the content section
        <style type="text/css">
        .noop-random-posts ul li {
            list-style-image: url("https://blogger.googleusercontent.com/img/b/R29vZ2xl/AVvXsEim53dBNy2bth8MXYxn1ZNlMWx8JIOC0_AR-2egq233mujKZ7mtfKXhgJzb7f5cUE4IZ8izeQc__v5urtwYOIiyH6iNtRIQu15frA91P_RhypUPJOw8kIecfI9WjB14VbCeB0Sm9nowLlo/s1600/tick+list+style.png");
        }
        </style>
        <div class="noop-random-posts"><script type="text/javascript">
            var randarray = new Array();var l=0;var flag;
            var numofpost=5;function nooprandomposts(json){
            var total = parseInt(json.feed.openSearch$totalResults.$t,10);
            for(i=0;i < numofpost;){flag=0;randarray.length=numofpost;l=Math.floor(Math.random()*total);for(j in randarray){if(l==randarray[j]){ flag=1;}}
            if(flag==0&&l!=0){randarray[i++]=l;}}document.write('<ul>');
            for(n in randarray){ var p=randarray[n];var entry=json.feed.entry[p-1];
            for(k=0; k < entry.link.length; k++){if(entry.link[k].rel=='alternate'){var item = "<li>" + "<a href=" + entry.link[k].href + ">" + entry.title.$t + "</a> </li>";
            document.write(item);}}
            }document.write('</ul>');}
            </script>
        <script type="text/javascript" src="/feeds/posts/default?alt=json-in-script&start-index=1&max-results=1000&callback=nooprandomposts"></script></div>
        Click on Save and its Done...If you have any doubts don't hesitate to ask.Please Comment.
        I hope you had enjoyed this post.Leave Comments...